If you want to automate several commands from your native shell, it will be faster to use our recipe command that allows you to run several CommandBox commands at once. This will allow you to only load the CommandBox engine once for all those commands, but still be dumped back at your native prompt when done. Recipes can also just be useful for a series of commands you run on a regular basis.
Read more about the recipe command in our Command API docs.
Think of a recipe as a simple batch file for Windows or a shell script for Unix. It's just a text file where you place one command on each line and they are executed in order. Enter the commands exactly as you would from the interactive shell.
Technically a recipe can have any file extension, but the default recommendation is .boxr which stands for "box recipe". Lines that start with a pound and whitespace characters (e.g. "# My Comments") will be ignored as comments. The pound character followed immediately by word-like characters is the mechanism for invoking CFML functions.
buildSite.boxr
# Start with an empty folder
rm mySite --recurse --force
mkdir mySite
cd mySite

# Initialize this folder as a package
init name=mySite version=1.0.0 slug=mySlug

# Scaffold out a site and a handler
coldbox create app mySite
coldbox create handler myHandler index

# Add some required package
install coldbox
install cbmessagebox,cbstorages,cbvalidation

# Set the default port
package set defaultPort=8081

# Start up the embedded server
startExecute your recipe with the recipe command, giving it the path to the recipe file.
recipe buildSite.boxrIf any commands in the recipe stop and ask for input, the recipe will pause until you supply that input. All commands that have confirmations, etc should have a --force flag for this purpose so you can run them headlessly without requiring your input. See the rm command above for an example.
You can also bind the recipe with arguments that will be replaced inside of your recipe at run time. Pass any arguments as additional parameters to the recipe command and they will be passed along to the commands in your recipe.
If you use named arguments to the recipe command, they will be accessible via environment variables inside the recipe as ${arg1Name}, ${arg2Name}, etc.
Consider the following recipe:
notifyWinner.boxr
echo "Hello there, ${name}, You've won a ${prize}!"You would call it like so:
recipe recipeFile=notifyWinner.boxr name=Luis prize="NEW CAR"Output:
Hello there, Luis, You've won a NEW CAR!Note, all parameters to the recipe command needed to be named, including the recipeFile.
Now let's look at the same recipe set up to receive positional parameters.
echo "Hello there, ${1}\n You've won a ${2}!"You would call it like so:
recipe notifyWinner.boxr Luis "NEW CAR"Output:
Hello there, Luis, You've won a NEW CAR!If an argument is not passed, you can use the default value mechanism:
echo "Hello there, ${name:human}, You've won a ${prize:something cool}!"You can use echo on and echo off in recipes to control whether the commands output to the console as they are executed. This can be useful for debugging or confirming the success of commands with no output. Echo is on by default.
Note, echo off doesn't suppress the output of the commands, just the printing of the command and its arguments prior to execution. This does not use the actual echo command and is a feature that only applies during the execution of recipes.
# Now you see me
echo on
version

# Now you don't
echo off
version
Output:
version
CommandBox 1.2.3.00000
echo off
CommandBox 1.2.3.00000You can use the exit command in a recipe and instead of leaving the entire shell, the recipe will simply stop execution right there. If an exit code is passed, it will because the exit code of the recipe command as well as the entire shell.
exit 1Any command that errors or returns a non-0 exit code will end the recipe immediately and the recipe command will inherit that exit code. This line in a recipe will stop the recipe if there is not a foobar property in your box.json, but not before outputting a message.
package show foobar || echo "Missing property!" && exit 999In addition to passing a file path to the recipe command for execution, you can also pipe the contents of a file directly into the command. if the input does not match a file path, it is assumed to be executable commands.
echo myCommands.txt | recipeThis can also give you some interesting ability to do dynamic evaluation of command strings.
set cmd=version
echo ${cmd} | recipeCommandBox's true power comes from it's command-based architecture, but we also support just running plain-jane .cfm files as well.
Take the following file for example:
test.cfm
<cfoutput>#now()#</cfoutput>We can execute this file directly from our native OS prompt by simply passing the filename straight into the box binary.
C:\> box test.cfm
{ts '2015-02-19 20:14:13'}
Or, I can run it from within the CommandBox interactive shell using the execute command:
CommandBox> execute test.cfm
{ts '2015-02-19 20:12:41'}Now, you people on Unix-based operating systems like Mac and Linux get a special treat. You can actually create natively executable shell scripts that contain CFML! Check out this file that has the special hash bang at top:
test
#!/usr/bin/env box

<cfoutput>#now()#</cfoutput>
All we need to do is make it executable
chmod +x testAnd then just run it like any other shell script!
$> ./test

{ts '2015-02-19 20:31:32'}The underlying engine used to execute your files will be the version of Lucee Server that the CLI is currently running on. Note, this can change between releases, and you can see the current version by running the info command. If you want to try to use the <cfadmin> tag to do things like create datasources, the default password for the Lucee server context is commandbox.
Hopefully this gives you a lot of ideas of how to start using CFML on your next automation task. And if you want even more control like print objects, object oriented code, and fancy parameters, look into making custom CommandBox commands.
You can already execute CFML functions in the REPL command to play in a sandbox, but sometimes you want to go further and actually use CFML directly in the CLI. This is where the cfml command comes in handy. The following runs the now() function. It is the equivalent to repl now().
cfml nowAs a handy shortcut, you can invoke the cfml command by simply typing the name of the CFML function, preceded by a # sign.
#nowWhen you pass parameters into this command, they will be passed directly along to the CFML function. The following commands are the equivalent of hash( 'mypass' ) and reverse( 'abc' ).
#hash mypass
#reverse abcThis really gets useful when you start piping input into CFML functions. Like other CFML commands, piped input will get passed as the first parameter to the function. This allows you to chain CFML functions from the command line like so. (Outputs "OOF")
#listGetAt www.foo.com 2 . | #ucase | #reverseBy piping commands together, you can use CFML functions to transform output and input on the fly to generate very powerful one-liners that draw on the many CFML functions already out there that operate on simple values.
Since this command defers to the REPL for execution, complex return values such as arrays or structs will be serialized as JSON on output. As a convenience, if the first input to an array or struct function looks like JSON, it will be passed directly as a literal instead of a string.
The first example averages an array. The second outputs an array of dependency names in your app by manipulating the JSON object that comes back from the package list command.
#arrayAvg [1,2,3]
package list --JSON | #structFind dependencies | #structKeyArray
The sky is the limit with the mashups you can create. This example runs your native java binary, uses CFML functions to strip out the first line, and then grabs a portion of that string via regex in the sed command.
echo "java -version" | run | #listToArray `#chr 10` | #arrayFirst | sed 's/java version "(.*)"/\1/'You must use positional parameters if you are piping data to a CFML function, but you do have the option to use named parameters otherwise. Those names will be passed along directly to the CFML function, so use the CF docs to make sure you're using the correct parameter name.
#directoryList path=D:\\ listInfo=nameOne common question is how to access the database from one of these scripts. Your code is executed on Lucee Server (version 4.5 at the time of this writing) which is the version of Lucee that the core CLI runs on. The CLI has the full power of a Lucee server running under the covers, but there's no web-based administrator for you to acess to do things like adding datasources for your scripts to use. It would considered poor form anyway since standalone scripts are best if they're self-contained and don't have external dependencies like server settings necessary to run.
So the easiest way to accomplish this is simply to exploit a little known but very cool feature of Lucee that allows the datasource attribute of most tags to be not only a string which contains the name of the datasource, but also a struct that contains the _definition_ of the datasource. This will create an on-the-fly connection to your database without any server config being necessary which is perfect for a stand-alone script. Here is what that looks like. Note, I'm using queryExecute(), but it would work just as well in a cfquery tag.
ds = {
class: 'org.gjt.mm.mysql.Driver',
connectionString: 'jdbc:mysql://localhost:3306/bradwood?useUnicode=true&characterEncoding=UTF-8&useLegacyDatetimeCode=true',
username: 'root',
password: 'encrypted:bc8acb440320591185aa10611303520fe97b9aa92290cf56c43f0f9f0992d88ba92923e215d5dfd98e632a27c0cceec1091d152cbcf5c31d'
};
var qry = queryExecute( sql='select * from cb_role', options={ datasource : ds } );
for( var row in qry ) {
echo( row.role & chr( 10 ) );
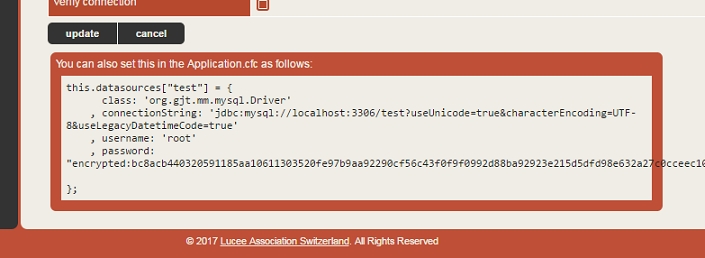
}So, the first block simply declares a struct that represents a datasource connection. Then I use that struct as my datasource. You might be thinking, "where the heck did he get that struct??". Glad you asked. Start up a Lucee 4 server, edit a datasource that has the connection properties you want and then at the bottom of the edit page you'll see a code sample you can just copy and paste from. This is the code for an `Application.cfc`, but you can re-use the same struct here.
There are a couple tags inside Lucee that don't support this just yet. `<CFDBInfo>` is one of them. [Ticket Here] In this case, you need a "proper" datasource defined that you can reference by name. Lucee has some more tricks up its sleeve for this. You can simulate the same thing that happens when you add a datasource to your `Application.cfc` with the following code. This will define a datasource for the duration of the time the CLI is running in memory, but it will be gone the next time you start the CLI.
appSettings = getApplicationSettings();
dsources = appSettings.datasources ?: {};

dsources[ 'myNewDS' ] = {
    class: 'org.gjt.mm.mysql.Driver',
    connectionString: 'jdbc:mysql://localhost:3306/bradwood?useUnicode=true&characterEncoding=UTF-8&useLegacyDatetimeCode=true',
    username: 'root',
    password: 'encrypted:bc8acb440320591185aa10611303520fe97b9aa92290cf56c43f0f9f0992d88ba92923e215d5dfd98e632a27c0cceec1091d152cbcf5c31d'
};
application action='update' datasources=dsources;

var qry = queryExecute( sql='select * from cb_author', options={ datasource : 'myNewDS' } );

for( var row in qry ) {
    echo( row.firstName & chr( 10 ) );
}
So let's break this down real quick. First we get the current settings of the CLI Lucee context and the list of current databases (may be null). Then we simply add the same datasource definition as above to the struct with the name we wish to use to reference this datasource. And finally we `update` the application with the new struct of datasources. Now we can use this datasource name just we would in a "normal" web application.
The internal CLI of CommandBox still runs on Luce 4.5 so make sure you copy the data source definitions from a Lucee 4.5 server, and not a 5.0 server. Also, you'll note I used encrypted passwords above. You can also just put the plain text password in. Just omit the `encrypted:` text like so:
username: 'root',
password: 'clear text password'If you want to execute a native binary from inside the interactive shell or as part of a CommandBox recipe, we allow this via the run command. You can read the API docs for run .
Hint This behavior is dependent on your operating system.
run binaryExecute an operation system level command using the native shell. For Windows users, cmd.exe is used. For Unix, /bin/bash is used. Command will wait for the OS command to finish.
The binary must be in the PATH, or you can specify the full path to it. Your keyboard will pass through to the standard input stream of the process if it blocks for input and the standard output and error streams of the process will be bound to your terminal so you see output as soon as it is flushed by the process.
!binaryA shortcut for running OS binaries is to prefix the binary with !. In this mode, any other params need to be positional. There is no CommandBox parsing applied to the command's arguments. They are passed straight to the native shell. As such, you don't need to escape any of the parameters for CommandBox when using this syntax.
OS Commands you run are executed in the same working directory as CommandBox. This means you can seamlessly invoke other CLIs without ever leaving the interactive shell.
The output of native calls can be used in or piped into other commands. Here's a Unix example that uses from the command line to parse the parent folder from the current working directory:
When passing a command string for native execution, ALL REMAINING TEXT in the line will be "eaten" by the native execution and passed to the OS for processing. This is so the CommandBox parser doesn't "'screw up" any special syntax that your OS command processor is expecting. That means any use of piping or && will get passed straight to the OS. On Windows, the following string will run the ver command twice in Windows.
In the event you want to pipe the result of an OS binary to another CommandBox command or chain another CommandBox command on the end, you can workaround this by echoing out the string and then piping that to the run command. This example will run the Windows ver command followed by the CommandBox ver command.
Additionally, any or will not be processed by CommandBox, but will be passed to the native OS directly. This Windows example won't do what you might think since the backticks are passed, untouched to the OS (so the OS can expand them if it needs):
Instead, you can pass the command text through echo to have CommandBox process the backtick expansions first before sending it off to the OS for processing.
In the above example, written for Windows, the output of the echo command has the package show name expression expanded into the string and then the ENTIRE string is piped to run where the pipe and the find command are processed by Windows. Note, there is no need for preceding the command with ! when passing to run since ! is just an alias for run.
If you're having issues getting a native binary to run, you can turn on a config setting that will echo out the exact native command being run including the call to your OS's command interpreter.
You can override the default native shell from /bin/bash to any shell of your choosing, like zsh. This will let you use shell specific aliases. You can set your native shell property using the config set command (i.e., config set nativeShell=/bin/zsh)
If the native binary errors, the exit code returned will become the exit code of the run command itself and will be available via the usual mechanisms such as ${exitCode}.
Any environment variables you set in the CommandBox shell will be available to the native process that your OS binary runs in. Here's a Windows and *nix example of setting an env var in CommandBox and then using it from the native shell.
run myApp.exe
run /path/to/myApp!myApp.exe
!/path/to/myApp
!dir
!netstat -pan
!npm ll
!ipconfig
!ping google.com -c 4
!java -jar myLib.jar!git init
touch index.cfm
!git add .
!git commit -m "Initial Commit"#listlast `!pwd` /!ver && verecho "ver" | run && ver!git status | find "'package show name'"echo 'git status | find "`package show name`"' | runconfig set debugNativeExecution=trueset name=brad
!echo %name%set name=brad
!echo $nameCommandBox follows the standard system of exit codes. In Bash or DOS, every process has an exit code that is available to the shell after execution is complete. The are as follows:
0 - Success
Any other number - Failure
This slightly counter intuitive to CFML developers since we are used to positive numbers as being truthy and zero as being falsy, but it is the industry standard for shells.
Every command that executes has an exit code. Usually the exit code is 0 if the command ran as expected. If an error of any kind was encountered, then the exit code will be a non-zero number. Often times 1. You can easily see this if you install the CommandBox Bullet Train module as it shows you the exit code of the last command to run. Commands such as testbox run will return a failing exit code if the tests being run didn't all pass.
You can access the last exit code from CommandBox in a System Setting called exitCode.
> !git status
fatal: not a git repository (or any of the parent directories): .git
Command returned failing exit code [128]
> echo ${exitCode}
128The CommandBox shell also keeps track of exit code of the last command. When the shell exits, it will report that last exit code to the OS. When running a one-off command from your native shell, the exit code of that command will be passed straight through to your native shell. This means that running something like
$> box testbox runfrom a Travis-CI build will automatically fail the build if the tests don't pass.
You can manually return an exit code from the shell passing the desired number to the exit command and the native OS will receive that code from the box binary.
exit 123Similar to bash, CommandBox allows you to chain multiple commands together on the same line and make them conditional on whether the previous command was successful or not.
You can use && to run the second command only if the previous one succeeded.
mkdir foo && cd fooYou can use || to run the second command only if the previous one failed.
mkdir foo || echo "I couldn't create the directory"You can use a single semi colon (;) to separate commands and each command will run regardless of the success or failure of the previous command.
mkdir foo; echo "I always run"With the above building blocks, we can get clever to create simple conditionals to only run commands if a condition is met. Or these can simply be used to cause recipes to stop execution or to fail builds based on a condition. The following commands output nothing, but they return an appropriate exit code based on their inputs.
Returns a passing (0) or failing (1) exit code whether the path exists. In this example, we only run the package show command if the box.json file exists.
pathExists box.json && package showYou can specify if the path needs to be a file or a folder.
pathExists --file server.json && server show
pathExists --directory foo || mkdir fooReturns a passing (0) or failing (1) exit code whether truthy parameter passed. Truthy values are "yes", "true" and positive integers. All other values are considered falsy
assertTrue `package show private` && run-script foo
assertTrue ${ENABLE_DOOM} && run-doom
assertTrue `#fileExists foo.txt` && echo "it's there!"Returns a passing (0) or failing (1) exit code whether both parameters match. Comparison is case insensitive.
assertEqual `package show name` "My Package" || package set name="My Package"
assertEqual ${ENVIRONMENT} production && install --productionThere are two ways to run commands via CommandBox: inside the CommandBox interactive shell, or one-at-a-time commands from your native shell.
If you open the interactive shell, you will see the CommandBox splash screen (ASCII art) and then you'll be presented with the CommandBox> prompt. You can enter as many commands as you wish in order and after each command is finished executing, you will be returned to the CommandBox prompt. If you have multiple commands you want to execute manually, this is the fastest method since CommandBox only loads once. This is also the only way to make use of features like tab complete and command history.
This example show running the box.exe executable from a Windows DOS prompt, executing the version, pwd, and echo commands, and then exiting back to DOS.
C:\>box.exe

   _____                                          _ ____
  / ____|                                        | |  _ \
 | |     ___  _ __ ___  _ __ ___   __ _ _ __   __| | |_) | _____  __
 | |    / _ \| '_ ` _ \| '_ ` _ \ / _` | '_ \ / _` |  _ < / _ \ \/ /
 | |___| (_) | | | | | | | | | | | (_| | | | | (_| | |_) | (_) >  <
  \_____\___/|_| |_| |_|_| |_| |_|\__,_|_| |_|\__,_|____/ \___/_/\_\  v1.2.3.00000

Welcome to CommandBox!
Type "help" for help, or "help [command]" to be more specific.
CommandBox> version
CommandBox 1.2.3.00000
CommandBox> pwd
C:\
CommandBox> echo "Hello World!"
Hello World!
CommandBox> exit

C:\>You can also spin up CommandBox from your native shell to execute a single command inline. You can do this if you only have one command to run, or you want to automate a command from a Unix shell script or Windows batch file. This mode will not show the ASCII splash screen, but keep in mind it still loads CommandBox up and unloads it in the background. Any output from the command will be left on your screen, and you will be returned to your native OS prompt.
Here is an example of running the version command from a Windows DOS screen. Note, you'll need to either do this from the directory that holds the box executable, or add the executable to your default command path so it is found.
C:\>box version
CommandBox 1.2.3.00000

C:\>
The box text is calling the CommandBox binary, and the version bit is passed along to the CommandBox shell to execute once it loads.
You can also activate CommandBox in debug mode by passing the -debug flag in the command line. This will give you much more verbose information about the running CommandBox environment. This affects both the interactive shell or one-off commands
box version -debug
box server start -debug
Output from commands will be ANSI-formatted text which, by default, streams directly to the console. When in the interactive shell, you can capture the output of commands and manipulate it, search it, or write it to a file. Use a pipe (|) to pass the output of one command into another command as its first input. Output can be piped between more than one command. Use a right bracket (>) and double right bracket (>>) to redirect output to the file system.
Pipe output into the grep command to apply a regex upon it. grep will only emit lines matching the regex.
cat myLogFile.txt | grep "variable .* undefined"Pipe output into the more command to output it line-by-line or page-by-page. Press the spacebar to advance one line at a time. Press the Enter key to advance one page at a time. Press ESC or “q” to abort output.
forgebox show | moreRedirect output into a file, overwriting if it exits like so:
dir > fileList.txtUse the double arrows to append to an existing file.
echo "Step 3 complete" >> log.txtYou can pipe a large amount of text or a file name into the tail command to only output the few lines of the text/file. Adding the --follow flag when tailing a file will live-stream changes to the file to your console until you press Ctrl-C to stop.
forgebox search luis | tail
system-log | tail lines=50
tail myLogFile.txt --followIf you want to add ad-hoc Java Properties to the actual CLI process, you can set an environment variable in your OS called BOX_JAVA_PROPS in this format:
BOX_JAVA_PROPS="foo=bar;brad=wood"That would create a property called foo and a property called brad with the values bar and wood respectively.
If you are using CommandBox in a continuous integration server such as Jenkins or Travis-CI, you may find that features like the progress bar which redraw the screen many times create hundreds of lines of output in the console log for your builds. You can enable a non interactive mode that will bypass the output from interactive jobs and the download progress bar.
config set nonInteractiveShell=trueIf there is no nonInteractiveShell setting, CommandBox will automatically default it to true if there is an environment variable named CI present, which is standard for many build servers such as Travis-CI.